
Codex Windows桌面版本, 尝试图片生成,居然有意外惊喜
By:Roy.LiuLast updated:2026-05-31
前面配置了命令行版本的codex, 今天尝试安装 codex windows桌面版本。直接从官网下载就好了,下载之后,执行安装程序,提示会从windows store里面下载,有点大,要等一段时间,然后会提示你已经安装好。
安装好之后,可以直接运行,然后突然发现,他的配置,直接用了昨天命令行用的配置,然后又加了一些模型配置。打开设置,可以看到配置文件:
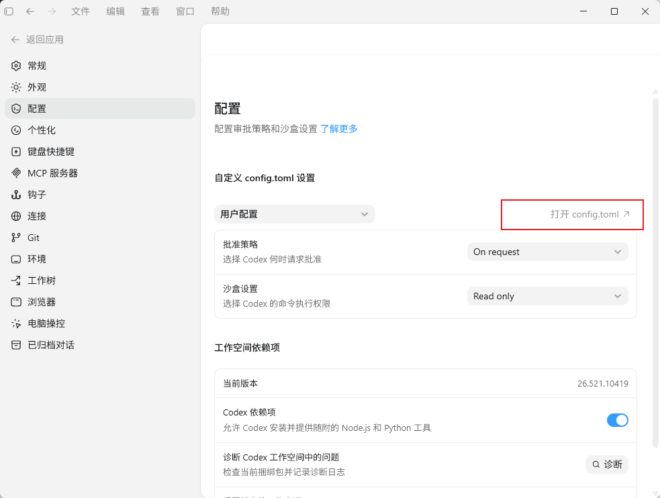
打开config.toml, 会发现桌面版本又添加了很多配置,比如:
[marketplaces.openai-bundled]
last_updated = "2026-05-31T05:22:36Z"
source_type = "local"
source = '\\?\C:\Users\LENOVO\.codex\.tmp\bundled-marketplaces\openai-bundled'

[marketplaces.openai-primary-runtime]
last_updated = "2026-05-31T05:23:31Z"
source_type = "local"
source = '\\?\C:\Users\LENOVO\.cache\codex-runtimes\codex-primary-runtime\plugins\openai-primary-runtime'

[plugins."browser@openai-bundled"]
enabled = true

[plugins."documents@openai-primary-runtime"]
enabled = true

[plugins."spreadsheets@openai-primary-runtime"]
enabled = true

[plugins."presentations@openai-primary-runtime"]
enabled = true

[features]
js_repl = false

[mcp_servers.node_repl]
args = []
command = 'C:\Users\LENOVO\AppData\Local\OpenAI\Codex\bin\34ab3e1324cc55b5\node_repl.exe'
startup_timeout_sec = 120
回到对话本身,这里尝试用他生成一张图片,提示词如下:设计一张大胆的Y2K风格日本街头编辑拼贴海报,采用简洁的高级时装杂志美学,搭配粗糙的纸张纹理、撕碎的杂志剪贴、做旧的墨水泼溅效果,以及充满东京都市风的设计。
然后codex 开始工作。
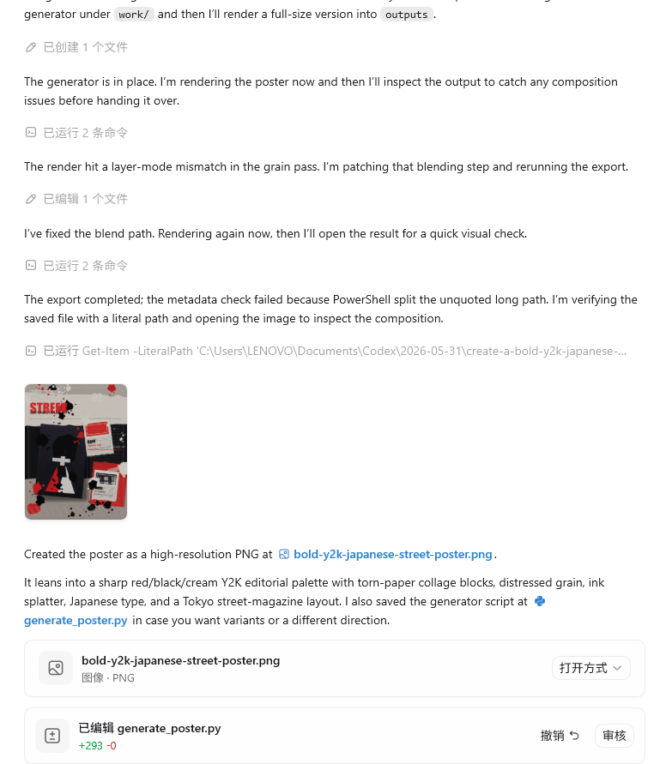
最终,生成了图片,还给出了python代码,这真实意外惊喜。打开python 代码源码如下:
from __future__ import annotations
import math
import random
from pathlib import Path
from PIL import Image, ImageChops, ImageDraw, ImageFilter, ImageFont, ImageOps
WIDTH = 1800
HEIGHT = 2400
SEED = 24
ROOT = Path(r"C:\Users\LENOVO\Documents\Codex\2026-05-31\create-a-bold-y2k-japanese-street")
OUTPUT = ROOT / "outputs" / "bold-y2k-japanese-street-poster.png"
FONT_SANS_BOLD = r"C:\Windows\Fonts\arialbd.ttf"
FONT_SANS = r"C:\Windows\Fonts\arial.ttf"
FONT_JP = r"C:\Windows\Fonts\YuGothB.ttc"
FONT_IMPACT = r"C:\Windows\Fonts\impact.ttf"
def noise_mask(size: tuple[int, int], density: float, blur: float = 0) -> Image.Image:
    w, h = size
    img = Image.new("L", size, 0)
    px = img.load()
    for y in range(h):
        for x in range(w):
            if random.random() < density:
                px[x, y] = random.randint(140, 255)
    if blur:
        img = img.filter(ImageFilter.GaussianBlur(blur))
    return img
def make_gradient(size: tuple[int, int], top: tuple[int, int, int], bottom: tuple[int, int, int]) -> Image.Image:
    w, h = size
    img = Image.new("RGB", size)
    draw = ImageDraw.Draw(img)
    for y in range(h):
        t = y / max(1, h - 1)
        color = tuple(int(top[i] * (1 - t) + bottom[i] * t) for i in range(3))
        draw.line((0, y, w, y), fill=color)
    return img
def add_film_grain(img: Image.Image, opacity: int = 55) -> Image.Image:
    base = img.convert("RGB")
    grain = noise_mask(base.size, 0.28, blur=0.2)
    grain_rgb = ImageOps.colorize(grain, black=(18, 12, 16), white=(255, 250, 245))
    return Image.blend(base, grain_rgb, opacity / 255)
def torn_strip(width: int, height: int, color: tuple[int, int, int], edge_variance: int = 30) -> Image.Image:
    base = Image.new("RGBA", (width, height), (0, 0, 0, 0))
    mask = Image.new("L", (width, height), 0)
    draw = ImageDraw.Draw(mask)
    top_points = []
    bottom_points = []
    step = max(20, width // 18)
    for x in range(0, width + step, step):
        top_points.append((x, random.randint(0, edge_variance)))
    for x in range(width, -step, -step):
        bottom_points.append((x, height - random.randint(0, edge_variance)))
    draw.polygon(top_points + bottom_points, fill=255)
    layer = Image.new("RGBA", (width, height), color + (255,))
    layer.putalpha(mask.filter(ImageFilter.GaussianBlur(0.6)))
    return layer
def irregular_polygon(center: tuple[int, int], radius: int, points: int) -> list[tuple[int, int]]:
    pts = []
    for i in range(points):
        ang = (math.tau * i / points) + random.uniform(-0.12, 0.12)
        r = radius * random.uniform(0.55, 1.15)
        pts.append((int(center[0] + math.cos(ang) * r), int(center[1] + math.sin(ang) * r)))
    return pts
def add_ink_splashes(base: Image.Image, count: int = 22) -> None:
    draw = ImageDraw.Draw(base, "RGBA")
    palette = [
        (10, 10, 12, 170),
        (220, 36, 36, 120),
        (245, 241, 231, 55),
    ]
    for _ in range(count):
        cx = random.randint(60, WIDTH - 60)
        cy = random.randint(60, HEIGHT - 60)
        radius = random.randint(20, 120)
        color = random.choice(palette)
        draw.polygon(irregular_polygon((cx, cy), radius, random.randint(7, 12)), fill=color)
        for _ in range(random.randint(3, 8)):
            dx = random.randint(-140, 140)
            dy = random.randint(-140, 140)
            rr = random.randint(6, 22)
            draw.ellipse((cx + dx - rr, cy + dy - rr, cx + dx + rr, cy + dy + rr), fill=color)
def magazine_cutout(size: tuple[int, int], accent: tuple[int, int, int], text_main: str, text_sub: str) -> Image.Image:
这段代码,我还没真实测过是否可以正常跑,但生成图片的同时,还给出了代码,这本身就是意外惊喜。
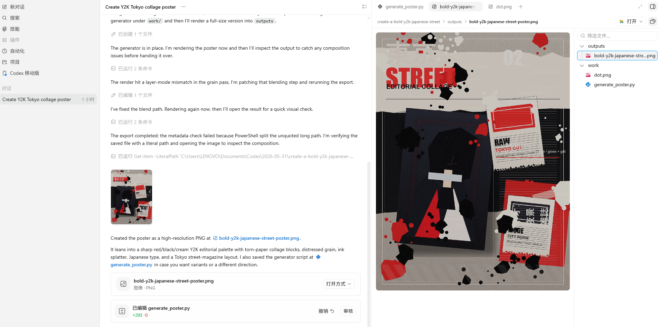
后面有时间验证一下这段代码。看一下生成图片要花多少token吧。
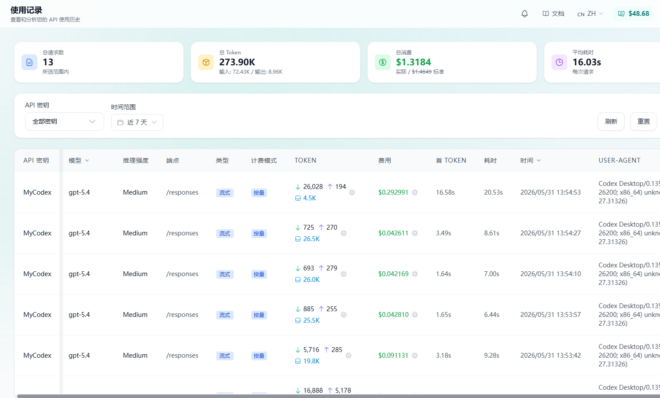
感觉太贵了,一张图片的生成差不多要一刀,难道是三方代理在搞鬼?太贵了。现在是测试codex的功能,先忍忍吧。
From:一号门
Previous:Codex 登录配置,apikey配置
Next:codex 命令行模式下的一些基础命令
COMMENTS