
Spring Boot Configure Tomcat SSL over HTTPS
This tutorial demonstrates how to use spring boot to configure embedded tomcat SSL over HTTPS. You can optionally configure multiple Tomcat Connectors to support both HTTP and HTTPS at the same time. Or we also show how to redirect HTTP traffic to HTTPS automatically. These last two optional configuration cannot be used simultaneously.
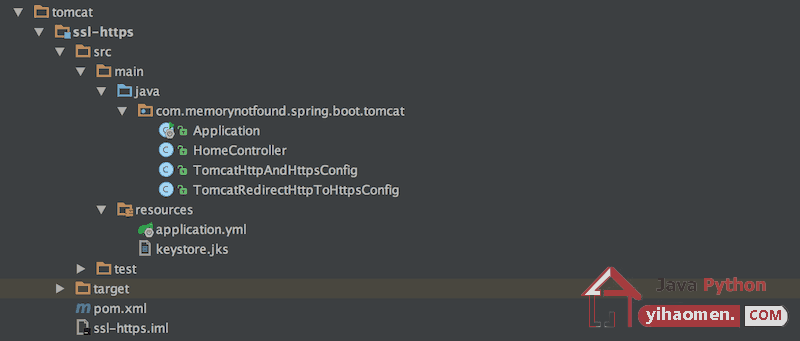
Project Structure
Let’s start by looking at the project structure.
Maven Dependencies
We use Apache Maven to manage our project dependencies. Make sure the following dependencies reside on the class-path.
<?xml version="1.0" encoding="UTF-8"?>
<project xmlns="http://maven.apache.org/POM/4.0.0"
         xmlns:xsi="http://www.w3.org/2001/XMLSchema-instance"
         xsi:schemaLocation="http://maven.apache.org/POM/4.0.0
                             http://maven.apache.org/xsd/maven-4.0.0.xsd">

    <modelVersion>4.0.0</modelVersion>
    <groupId>com.memorynotfound.spring.boot.tomcat</groupId>
    <artifactId>ssl-https</artifactId>
    <version>1.0.0-SNAPSHOT</version>
    <url>http://memorynotfound.com</url>
    <name>Spring Boot - ${project.artifactId}</name>

    <parent>
        <groupId>org.springframework.boot</groupId>
        <artifactId>spring-boot-starter-parent</artifactId>
        <version>1.5.8.RELEASE</version>
    </parent>

    <properties>
        <project.build.sourceEncoding>UTF-8</project.build.sourceEncoding>
        <java.version>1.8</java.version>
    </properties>

    <dependencies>
        <dependency>
            <groupId>org.springframework.boot</groupId>
            <artifactId>spring-boot-starter-web</artifactId>
        </dependency>
    </dependencies>

    <build>
        <plugins>
            <plugin>
                <groupId>org.springframework.boot</groupId>
                <artifactId>spring-boot-maven-plugin</artifactId>
            </plugin>
        </plugins>
    </build>

</project>
Generate Java Keystore and Self Signed Certificate
We are encrypting our network traffic, so we need a certificate to encrypt the traffic and a keystore to put the certificate in. Since we are developers, we can generate a self-signed-certificate to reduce costs while developing. By default java is shipped with a keytool which can generate self-signed-certificates and create a keystore. Use the following command:.
memorynotfound:ssl-https memorynotfound$ keytool -genkey \
-alias tomcat-localhost \
-keyalg RSA \
-keysize 2048 \
-validity 3650 \
-keystore keystore.jks

Enter keystore password:
Re-enter new password:
What is your first and last name?
  [Unknown]:
What is the name of your organizational unit?
  [Unknown]:
What is the name of your organization?
  [Unknown]:
What is the name of your City or Locality?
  [Unknown]:
What is the name of your State or Province?
  [Unknown]:
What is the two-letter country code for this unit?
  [Unknown]:
Is CN=Unknown, OU=Unknown, O=Unknown, L=Unknown, ST=Unknown, C=Unknown correct?
  [no]:  y

Enter key password for <tomcat-localhost>
        (RETURN if same as keystore password):
Re-enter new password:
Configure Tomcat using Spring Boot
We can configure Spring Boot using the application.yml file located in the src/main/resources folder.
server:
  port: 8443
  ssl:
    enabled: true
    key-alias: tomcat-localhost
    key-password: changeit
    key-store: classpath:keystore.jks
    key-store-provider: SUN
    key-store-type: JKS
    key-store-password: changeit
Redirect HTTP to HTTPS (1a: optional)
We can optionally configure the embedded tomcat to redirect HTTP traffic to HTTPS automatically.
package com.memorynotfound.spring.boot.tomcat;

import org.apache.catalina.Context;
import org.apache.catalina.connector.Connector;
import org.apache.tomcat.util.descriptor.web.SecurityCollection;
import org.apache.tomcat.util.descriptor.web.SecurityConstraint;
import org.springframework.boot.context.embedded.EmbeddedServletContainerFactory;
import org.springframework.boot.context.embedded.tomcat.TomcatEmbeddedServletContainerFactory;
import org.springframework.context.annotation.Bean;
import org.springframework.context.annotation.Configuration;

@Configuration
public class TomcatRedirectHttpToHttpsConfig {

    @Bean
    public EmbeddedServletContainerFactory servletContainer(){
        TomcatEmbeddedServletContainerFactory tomcat = new TomcatEmbeddedServletContainerFactory(){
            @Override
            protected void postProcessContext(Context context) {
                SecurityConstraint securityConstraint = new SecurityConstraint();
                securityConstraint.setUserConstraint("CONFIDENTIAL");
                SecurityCollection collection = new SecurityCollection();
                collection.addPattern("/*");
                securityConstraint.addCollection(collection);
                context.addConstraint(securityConstraint);
            }
        };
        tomcat.addAdditionalTomcatConnectors(redirectConnector());
        return tomcat;
    }

    private Connector redirectConnector(){
        Connector connector = new Connector(TomcatEmbeddedServletContainerFactory.DEFAULT_PROTOCOL);
        connector.setScheme("http");
        connector.setPort(8080);
        connector.setSecure(false);
        connector.setRedirectPort(8443);
        return connector;
    }
}
Support Both HTTP and HTTPS (1b: optional)
If you want to support both HTTP and HTTPS traffic, you’ll need to programatically create a second Tomcat Connector. We can configure the HTTPS connector using application.properties or application.yml files. Since the HTTP connector is the easiest to setup programatically. Note: these two optional configuration cannot be used simultaneously.
package com.memorynotfound.spring.boot.tomcat;

import org.apache.catalina.connector.Connector;
import org.springframework.boot.context.embedded.EmbeddedServletContainerFactory;
import org.springframework.boot.context.embedded.tomcat.TomcatEmbeddedServletContainerFactory;
import org.springframework.context.annotation.Bean;
import org.springframework.context.annotation.Configuration;

@Configuration
public class TomcatHttpAndHttpsConfig {

    @Bean
    public EmbeddedServletContainerFactory servletContainer(){
        TomcatEmbeddedServletContainerFactory tomcat = new TomcatEmbeddedServletContainerFactory();
        tomcat.addAdditionalTomcatConnectors(httpConnector());
        return tomcat;
    }

    private Connector httpConnector(){
        Connector connector = new Connector(TomcatEmbeddedServletContainerFactory.DEFAULT_PROTOCOL);
        connector.setScheme("http");
        connector.setPort(8080);
        connector.setSecure(false);
        return connector;
    }
}
Spring Boot
We use spring boot to bootstrap our application. The @SpringBootApplication triggers the EnableAutoConfiguration and ComponentScan. This is a convenience annotation that is equivalent to declaring @Configuration, @EnableAutoConfiguration and @Configuration.
package com.memorynotfound.spring.boot.tomcat;

import org.springframework.boot.SpringApplication;
import org.springframework.boot.autoconfigure.SpringBootApplication;

@SpringBootApplication
public class Application {

    public static void main(String... args){
        SpringApplication.run(Application.class, args);
    }
}
Simple Rest Controller
We create a simple rest service which is mapped to the root.
package com.memorynotfound.spring.boot.tomcat;

import org.springframework.web.bind.annotation.GetMapping;
import org.springframework.web.bind.annotation.RestController;

@RestController
public class HomeController {

    @GetMapping("/")
    public String welcome(){
        return "Hello, World";
    }
}
Console Output
When we start the application we can see that tomcat is initialized with ports 8843 and 8080.
  .   ____          _            __ _ _
 /\\ / ___'_ __ _ _(_)_ __  __ _ \ \ \ \
( ( )\___ | '_ | '_| | '_ \/ _` | \ \ \ \
 \\/  ___)| |_)| | | | | || (_| |  ) ) ) )
  '  |____| .__|_| |_|_| |_\__, | / / / /
 =========|_|==============|___/=/_/_/_/
 :: Spring Boot ::        (v1.5.8.RELEASE)

...
s.b.c.e.t.TomcatEmbeddedServletContainer : Tomcat initialized with port(s): 8443 (https) 8080 (http)
...
s.b.c.e.t.TomcatEmbeddedServletContainer : Tomcat started on port(s): 8443 (https) 8080 (http)
Demo
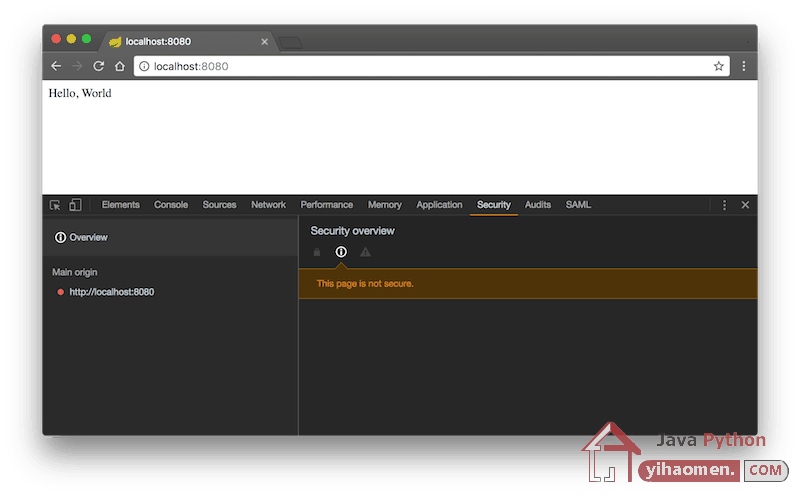
In this demo we configured both HTTP and HTTPS connectors. When we go to the following URL: http://localhost:8080/ we receive the following output.
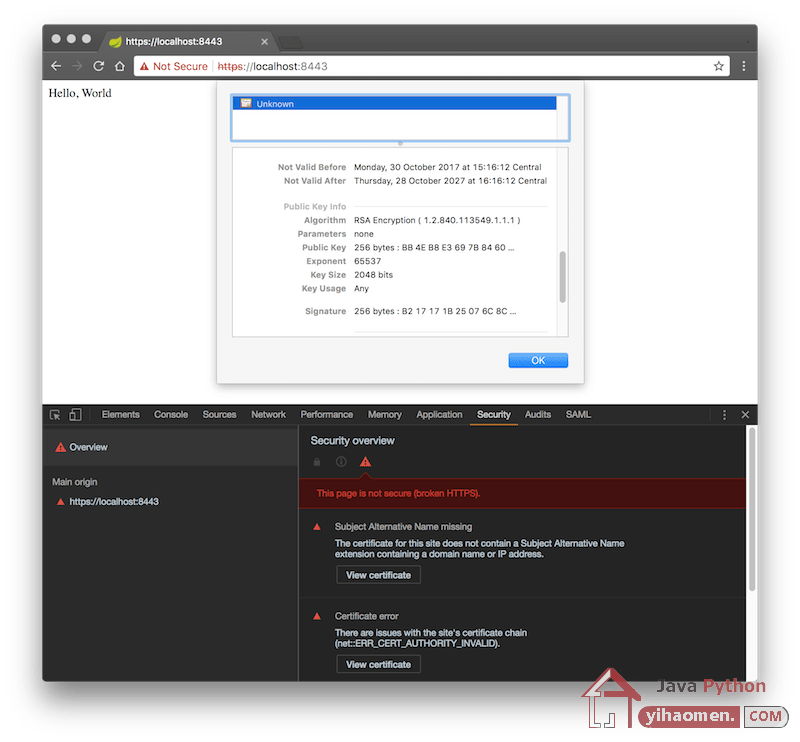
In the second example we configured that all traffic goes to HTTPS. If we go to http://localhost:8080/ we are automatically redirected to https://localhost:8443/. If we open the security tab in google chrome, we can inspect the certificate. Since we are using a self-signed certificate google chrome is telling us that the connection is not secure because the certificate isn’t validated against a known authority.
Download
From:一号门
COMMENTS